
Who says you need a costly hair gel to style your locks? You can make your own hair gel right at home with just a few simple ingredients.
Check out our DIY hair gel recipe below and learn how to create this styling product for cheap. With this frugal hack, you’ll never have to spend big bucks on hair care again!
How to Make DIY Hair Gels
Making DIY hair styling gel is not only easy but extremely pocket-friendly. That’s not all – it’s versatile, chemical and preservative-free, free from harmful ingredients or carcinogens, non-toxic, and the best part – it’s good for your hair and scalp!
Not only do you save money, but you also have fun while DIYing your way to healthy hair and scalp. Depending on the ingredients you choose, it can also help with hair and scalp issues.
Let’s take a look at a few homemade hair gel recipes.
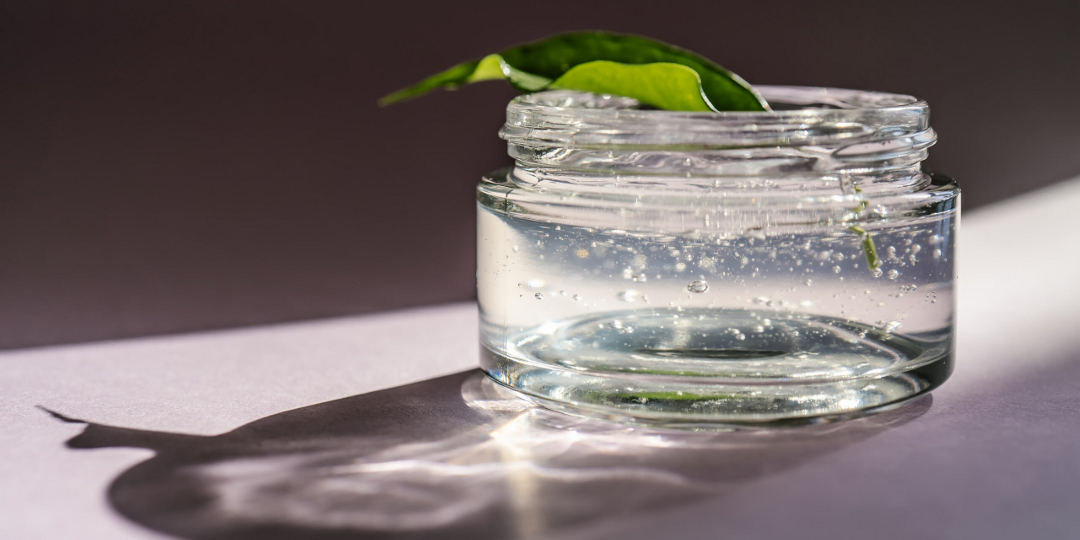
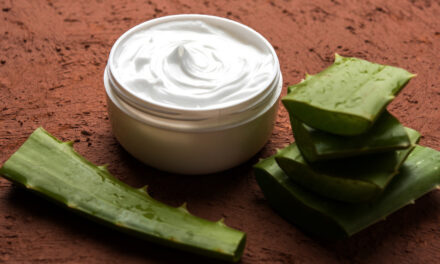
1. DIY Vegan Aloe Hair Gel
A very simple and straightforward recipe that works well for light hold while also nourishing and moisturizing hair. Want soft and shiny hair? Try this hair gel and see how it goes.
What You’ll Need
- Aloe Vera Leaves – 2
- Vitamin E Oil – 5 Drops
- Natural Lemon Extract – a few drops
- Olive Oil – 1 Tbsp.
- Peppermint Essential Oil – 7 – 16 Drops
How To Make
- Unless you’re using store-bought aloe gel, you’re going to need one prepared for best results. This way, you can store the remaining gel if needed.
- Cut the underside of the aloe leaf and let it stand till the sap oozes out – a greenish hue substance. It takes about 20 – 30 minutes – though you can skip this step if it’s not for internal use for the most part.
- Remove the thorny edges from the aloe leaf, and cut open the fleshy aloe leaf.
- Scoop out the aloe vera gel and add it to your mixer.
- To this, add the vitamin E oil and vitamin C extract and run your mixer for a few seconds.
- Your aloe gel is ready for use!
- Now, take out the required quantity of aloe gel – depending on your hair length, you need a cup or more. So, add more or less per your requirement.
- Now, add the peppermint oil and olive oil to the aloe gel you prepared and whisk for a few seconds till well combined.
- Done!
- Transfer to a sterilized glass jar.
How To Use
Take a dollop or more of the aloe hair gel and apply it to your hair.
It’s light, so you don’t have to worry about weighing your hair down and staying clear of the roots – in fact dab a little on your roots for the goodness of aloe vera!
Style as usual.
Notes
If you’re using a store-bought gel, you can skip the first few steps where you make aloe vera gel from scratch. However, make sure to choose organic and pure aloe vera gel.
You can choose any essential oil of your choice that’s hair beneficial ideally or your favorite aroma.
If you have shorter hair or are preparing for the ones with short hair in your family, prepare smaller batches. All natural products will have a shorter shelf life. It’s better to refrigerate if you’re using this for more than a few days.
This is for lighter hold, so there’s no cast on your hair or the stuffiness that comes with commercial hair gels that offer more hold. This means while your style will hold, you can still run your fingers through your hair for a relaxing massage without worrying about fingers getting stuck or mussing up your hair!
This suits all hair types and adds shine to your hair.
2. DIY Honey Hair Gel
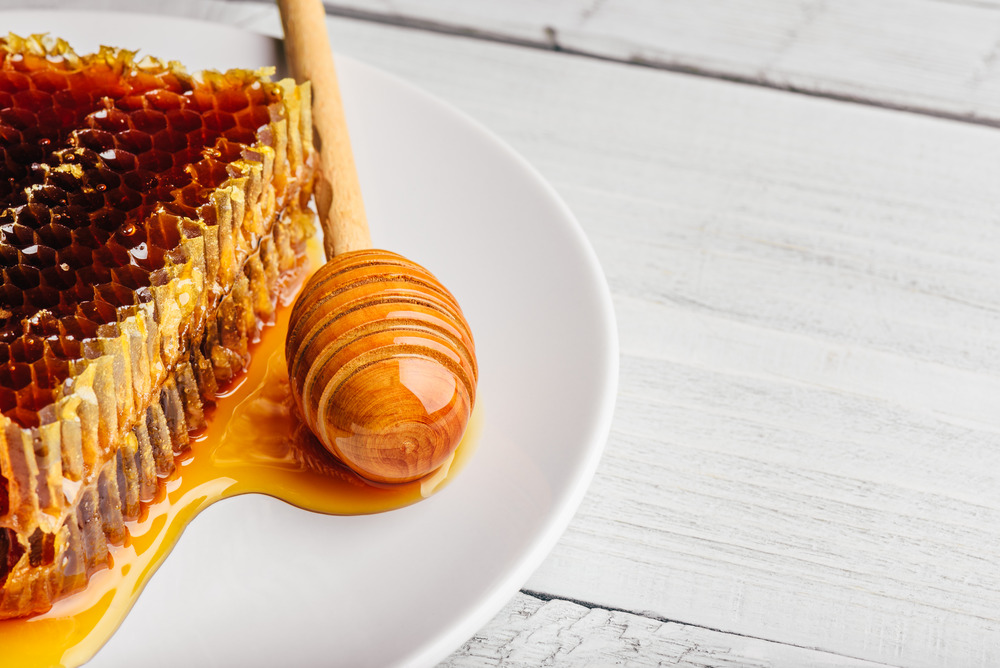
This is a super moisturizing and nourishing hair gel that gives you a high hold! This is a gift for those with curly locks or who want to tame flyaways, wisp, or frizz, though it is suitable for all hair types.
What You’ll Need
- Honey – 1/2 Tsp.
- Flax Seeds – 1/2 Cup
- Lavender Essential Oil – 16 Drops
- Shea Butter – 1/2 Tsp.
How To Make
- To prepare flaxseed gel, bring the flax seeds to a rolling boil in 2 cups of water.
- Alternatively, you can soak the seeds overnight in a cup of water and do the gel. That way, you won’t need to simmer for long.
- When the mixture thickens and turns foamy, remove it from heat.
- As soon as you can, strain the gel into a mixing bowl.
- You can use a cheesecloth or a fine strainer to get the gel without much fuss – it’s easier when hot or warm than cold, where it begins to thicken a little more.
- After straining, add in the honey, lavender oil, and shea butter.
- Blend with your hand blender to combine well.
- Transfer to an airtight container.
- Done!
How To Use
Take a small dollop and apply it to your damp hair.
Style as usual – you can scrunch for defined curls or waves.
Notes
You can add more or fewer flax seeds depending on your consistency preference. You can make it as thick or thin as you want. It’s not about precise measurements really. If you add a 1:1 ratio, the hold is usually good, though you can add 1/2 the quantity of water for the stronghold – especially when not using honey.
Don’t add too much honey, it can leave your hair sticky.
You can use your favorite essential oil in this recipe instead of lavender.
You can swap the shea butter for olive oil, jojoba oil, or coconut oil according to your preference. Shea butter is especially good for curly hair or dry and damaged hair.
Some find flax seed gel drying. Honey fixes that, even if the nourishing shea isn’t enough.
3. DIY Lemony Hair Gel
This recipe uses agar agar, which is a gelatin gel alternative. Many are put off due to the smell of gelatin, and this recipe is for those who don’t want to risk using gelatin as a leave-in.
What You’ll Need
- Agar Agar – 1 Tsp.
- Aloe vera gel – 1 Tbsp.
- Lemon Essential Oil – 26 Drops
How To Make
- Soak the agar agar flakes or strands in a cup of water for 7 – 10 minutes.
- Heat a cup of water and add in the soaked agar agar.
- Let it come to a rolling boil, and reduce the flame.
- Simmer it for about 7 minutes and remove it from the heat.
- Once it cools down, add in the aloe vera gel and lemon essential oil.
- Mix to combine and transfer to a sterilized glass jar.
- Done!
How To Use
Take a dollop of this gelatin gel, or as required, according to your hair length.
Apply on your hair and style as usual.
Notes
Agar agar is derived from seaweeds and can be applied on your hair and scalp without worrying about it weighing down your hair or cast.
This combination is also gently nourishing and suits oily hair and scalp better.
You can swap the lemon essential oil for an essential oil of your choice.
4. DIY Vegan Chia Hair Gel
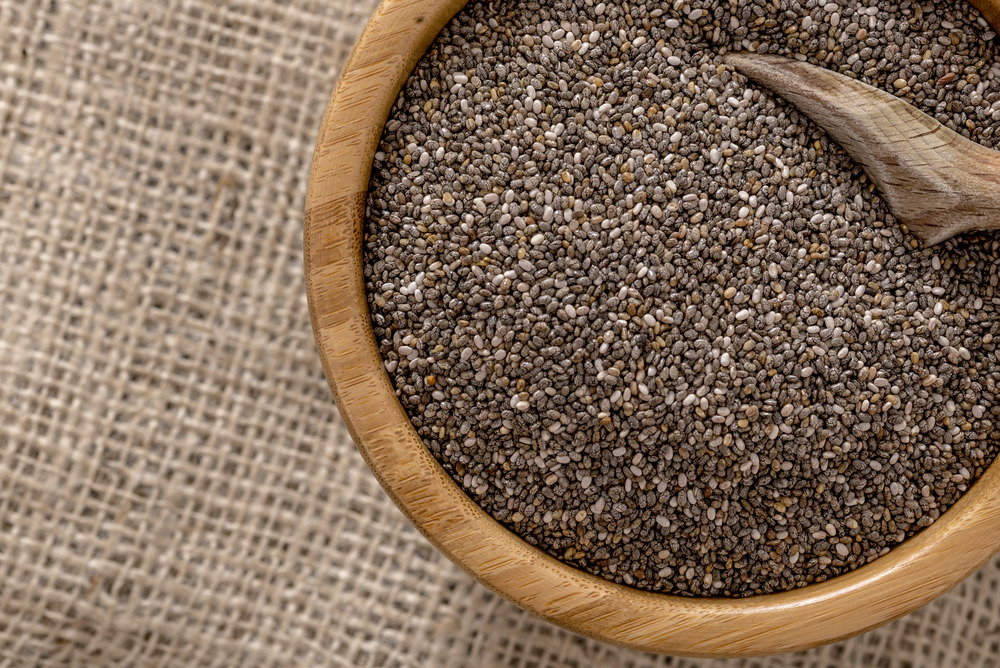
Don’t have flax seeds handy, or does flaxseed gel leave you with dry hair? No worries, try this chia seeds hair gel instead! It’s natural, easy, and vegan.
What You’ll Need
- Chia Seeds – 1/3 Cup
- Rose Absolute Extract – a few drops
How To Make
- Preparing gel using chia seeds is very similar to the flax seed gel process.
- Add the chia seeds to a cup of water and bring it to a rolling boil.
- Simmer and let it boil till the mixture thickens.
- Sieve the mixture and let it cool down.
- Add in the rose absolute extract and blend with your hand blender to combine.
- Transfer to a sterilized glass jar.
- Done.
How To Use
Take an adequate quantity of the chia gel and apply it to your hair – don’t worry about touching the roots. This is nourishing goodness and light. So, no worries there!
Style as usual.
Notes
You can use coconut oil for a moisture boost.
Essential oils are a way to add aroma and boost the recipe benefits naturally. Choose any of the essential oils you like, preferably hair-beneficial ones, to get more from this recipe.
This, again, is a great rescue aid for curly locks that are frizzy, dry, and flat. However, it suits all hair types and doesn’t weigh down your hair.
5. DIY Vegan Flax Hair Gel
The Flax seed hair gel recipe is really simple and great especially when you’re battling limp and oily hair. This is a straightforward recipe and does wonders for your hair.
What You’ll Need
- Flax Seeds – 1/2 Cup
- Tea Tree Oil – 15 drops
- Aloe vera gel – 1 Tsp.
How To Make
- Soak flax seeds overnight in half a cup of water.
- Bring it to a rolling boil and simmer till the mixture turns thick and foamy.
- Sieve the gel using a cheesecloth and set aside to cool.
- When slightly cooled, add aloe vera gel and tea tree oil.
- Whisk with your hand blender to combine and transfer to a sterilized glass jar.
How To Use
Apply this gel to your hair as needed.
You can be a little liberal if your hair is frizzy or dry, or damaged.
You don’t have to consciously avoid the scalp, as this is a light and nourishing recipe.
Style as usual and enjoy the soft and silky locks.
6. DIY Gelatin Hair Gel

This is no surprise considering the first thing anyone is reminded about when thinking gel is gelatin. This is not a vegan or even vegetarian recipe, but it’s nourishing and really works wonders for your hair. Let’s get started, shall we?
What You’ll Need
- Gelatin – 1 Tsp.
- Rosemary Essential Oil – 16 Drops
- Lemon Essential Oil – 7 Drops
- Water – 1 Cup
How To Make
- Warm up the water in a bowl.
- Add the gelatin powder to a bowl and pour warm water over it.
- Let it sit for about five minutes to bloom.
- Add in the essential oils and give it a good whisk.
- Transfer to a sterilized glass jar.
- Done.
How To Use
Apply this hair gel to your hair and cover it all the way to the tips.
Style as usual.
Notes
This recipe gives a strong hold. If you’re looking for light or medium hold, reduce the gelatin-to-water ratio. It will be 1/2 Tsp per cup for light hold and 3/4th Tsp per cup for medium hold.
This natural hair gel recipe is particularly useful for those with oily scalp and hair, though it can be customized for any hair type by changing the essential oils added according to your requirements and preferences.
Gelatin tends to smell bad without additional ingredients to up the aroma quotient. Even so, make sure to mix well and check before use so you can swap if needed.
Use unflavored gelatin for preparing your hair gel.
This also doubles up as a gelatin mask and nourishes hair.
You can add a spoonful of coconut oil for a moisture boost. It is also a great hair-strengthening ingredient.
With regular use, this hair gel improves hair growth.

7. DIY Vegan Olive Hair Gel
Olive oil is extremely nourishing and is used widely to help curly locks stay moisturized and frizz-free. So, we’re adding this goodness to our hair gel for this extra moisturizing and nourishing homemade hair gel recipe.
What You’ll Need
- Flaxseeds – 1/2 Cup
- Distilled Water – 1 Cup
- Olive Oil – 1 Tbsp.
- Sandalwood Essential Oil – 5 Drops
How To Make
- Soak the flax seeds overnight and prepare the gel the next morning by bringing the mixture to a rolling boil and simmering till ready.
- Once done, sieve the gel and add in the olive oil and sandalwood oil.
- Whisk briskly to combine and transfer to a sterilized glass jar.
- Done!
- Alternatively, if you’re already making flaxseed gel for another recipe, you can reserve some for this recipe and take it from there or use your existing flaxseed gel.
How To Use
Apply the hair gel liberally on your hair and style it as usual.
You can apply this on dry hair or damp hair.
Notes
You can add aloe vera for shine and nourishment.
You can even add a dash of magnesium flakes for textured waves.
You can also use chia gel if that’s more suitable for your hair type.
This is typically to soothe and moisturize dry and frizzy hair, though it is suitable for all types just the same.
You can use any essential oil of your choice to get an aroma you like.
You can swap olive oil for coconut oil if you’re good with it. Some find it drying, so choose according to your requirements.
If you’re not vegan, you can use gelatin instead of flax seeds for a protein boost.
Benefits of Using DIY Hair Gel
Homemade hair gels are prepared using natural ingredients, usually beneficial ingredients for hair and scalp.
They don’t contain harsh or harmful chemicals, preservatives, parabens, alcohol, etc.
It makes sense to prepare them because they’re affordable and keep your hair and scalp happy.
You can prepare a batch that’s as large or as small as you want, modify and try out variations and more.
DIY is fun, and homemade hair gels can be customized to suit any hair type or requirement – straight hair, curly hair, dry hair, wavy hair, frizzy hair, etc.
Most homemade hair gels are light and can be applied on the scalp for nourishing hair treatment.
Homemade hair gel promotes hair growth, curbs hair fall, doesn’t leave a cast, can be frozen on an ice cube tray for a longer duration, etc.
Though without preservatives, they’re not shelf stable like regular hair gel, they give it a run for its money when refrigerated.
It’s cruelty-free and often prepared with ingredients you have handy.
How To Store Your DIY Hair Gel
All the recipes shared here are for natural hair gels and, as such, don’t include preservatives. While some can be kept on the shelf for a few days, it’s best to refrigerate them for a longer shelf life and keep them mould-free.
Always transfer your homemade hair gel to a hot water sterilized glass container and refrigerate it after it cools down.
Make sure the container is airtight, and always use a dry and clean scoop to scoop out the required quantity of hair gel.
Adding Vitamin C extract, citric acid, and Vitamin E oil does add some shelf life to the recipes, but they’re not foolproof.
Also, high temperatures can break down the hair gel as they’re made using only natural ingredients.
So refrigerate for best results – it prevents contamination and protects it from harsh climates.
Final Thoughts
Going DIY for your product requirements is taking the first step in the right direction for hair care. Don’t have time for DIY recipes, or are worried about getting things right or issues? Don’t worry, we have you covered with a broad range of premium hair cosmetics from Vitamins Revive. There’s a product for every one of you and any requirement or preference you may have. Do check out their range to know more.
As always, feel free to write to us with any questions or requests. We love hearing from you, and your feedback helps us do better.
FAQs
What is natural hair gel?
Natural hair gel is better and nutrient-rich compared to regular hair gels off the shelves that are loaded with harsh ingredients that do more harm than good.
Depending on the recipe, you’ll get light to strong hold, and a few tweaks and trials later, you’ll be a pro at preparing your own hair gels that will give firm hold or your desired consistency and results.
How long does homemade hair gel last?
Homemade hair gels are usually prepared with natural ingredients and without preservatives. So, it would not last on the shelf much, though with refrigeration, it lasts for a few weeks, depending on the recipe.
However, preparing smaller batches means you always have a fresh supply that can be tweaked according to your liking before you identify one that you like best.
Is it OK to use hair gel every day?
Natural hair gels are nourishing and benefit hair and scalp. For this reason, they can be used daily, though you can rinse them off between washes if needed.
Depending on your hair type, you might need it every day. Unlike straight, long hair, curly hair might need it more frequently as it tends to dry out faster.
Is natural hair gel safe?
Not only is homemade hair gel safe, but it’s also cruelty-free. Depending on the ingredients chosen, it is also beneficial and can nourish, nurture, and strengthen hair. As long as they’re stored properly and aren’t contaminated, they’re absolutely safe. However, don’t forget to do a patch to eliminate any risk factors ahead of the first use.


